Packaging Tube Mockup: The Professional’s Guide to Showcasing Design Work
In the competitive world of branding and product design, first impressions are everything. When you have spent hours perfecting a label for a cosmetic jar, a pharmaceutical tube, or a specialty food container, presenting that design in a flat, two-dimensional image often fails to convey its true potential. Clients and stakeholders need to visualize how the graphics will wrap around curves, how the typography interacts with shadows, and how the overall aesthetic feels in a real-world context. This is where a high-quality Packaging Tube Mockup becomes an indispensable tool in your creative arsenal.
A packaging tube mockup is not just a static image; it is a realistic 3D display designed to showcase your designs professionally. By using this resource, designers can bridge the gap between digital concepts and physical reality, allowing them to present their work with confidence and clarity. Whether you are a freelance graphic designer, a marketing agency, or a small business owner launching a new product, understanding how to leverage these tools can significantly elevate your presentation quality.
The Challenge of Presenting Cylindrical Designs
One of the most persistent challenges for designers working on cylindrical packaging is translating a flat vector or raster file into a three-dimensional object without losing detail or introducing distortion. Traditional methods might involve complex 3D modeling software like Blender or Cinema 4D. While powerful, these tools require steep learning curves and significant time investment. For many professionals, the priority is speed and ease of use rather than building a 3D model from scratch.
Furthermore, lighting and texture play a crucial role in perception. A poorly lit render can make even the best design look unappealing. Without the right environment, clients may struggle to see how the colors pop or how the material finish (matte vs. glossy) affects the visual impact. The goal here is to provide a solution that is both photorealistic and efficient, allowing the design itself to take center stage.
How Packaging Tube Mockup Solves These Problems
This is where a dedicated Packaging Tube Mockup shines. Specifically designed for efficiency and realism, this tool allows you to replace the current designs with your own within seconds. The core functionality relies on Smart-Object features available in Photoshop, which streamline the workflow dramatically. Instead of manually warping images or adjusting perspective points, you simply drag and drop your artwork into the designated layer.
The process is intuitive and user-friendly. When you open the PSD file, you will find specific layers labeled for the design application. By double-clicking this layer, your chosen design opens in a new window. Once you place your artwork and save the changes, the mockup automatically updates, wrapping your design onto the tube with accurate perspective, lighting, and shadows. This capability ensures that your final presentation looks polished and professional, regardless of your 3D modeling expertise.
Key Features That Enhance Your Workflow
To truly appreciate the value of this resource, it is helpful to look at the technical specifications that support its usability. A well-crafted mockup should offer flexibility and high fidelity. Here are the critical features that define a top-tier Packaging Tube Mockup:
- Smart-Object Integration: The primary advantage is the use of Smart Objects. This feature allows for non-destructive editing. You can experiment with different color schemes, logos, or text layouts without altering the original source file. If a client requests a change, you can swap out the design instantly, saving valuable time during revision rounds.
- High Resolution and Detail: Quality matters when presenting to discerning clients. With a size of 3000x2000 px and a resolution of 300 dpi, this mockup provides ample detail for both screen viewing and print preparation. The high pixel count ensures that textures, such as the subtle grain of paper or the sheen of plastic, remain crisp and clear.
- Changeable Background Color: Context influences perception. A white background might suit a clean, minimalist medical product, while a dark, moody background could enhance a luxury cosmetic brand. The ability to change the background color allows you to tailor the presentation to match the brand identity you are showcasing.
- Comprehensive Support: Even the most straightforward tools benefit from guidance. This package includes a PDF help guide, ensuring that even those less familiar with Photoshop layers can navigate the file with ease. This reduces the friction of adoption and gets you up and running quickly.
Practical Applications Across Industries
The versatility of a Packaging Tube Mockup extends across various industries. It is not limited to a single type of product. Consider the following scenarios where this tool proves particularly useful:
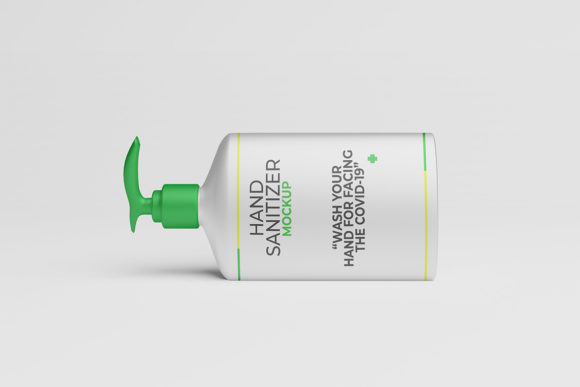
Cosmetics and Skincare: Brands often sell lip balms, serums, or lotions in tube formats. A realistic mockup helps demonstrate how metallic foils or vibrant gradients will appear on the curved surface, helping marketers communicate premium quality.
Pharmaceuticals and Health: Ointments, creams, and gels are frequently packaged in squeezable tubes. In this sector, clarity and trust are paramount. A clean, well-lit mockup can highlight the legibility of dosage instructions and the professionalism of the brand logo.
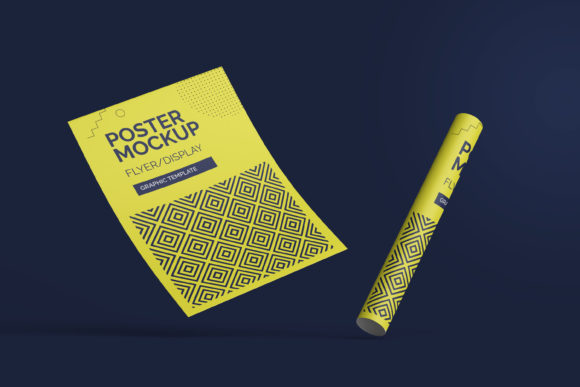
Food and Beverage: From toothpaste to spicy pastes, food-related products in tubes benefit from appetizing visuals. Designers can use the mockup to show how bold typography and bright colors attract attention on crowded retail shelves.
Best Practices for Implementation
While the tool makes the technical process easy, achieving the best results requires thoughtful design practices. When preparing your artwork for the Packaging Tube Mockup, keep the following recommendations in mind:
- Vector Over Raster: Whenever possible, prepare your design elements as vectors. This ensures that lines and text remain sharp when scaled to fit the curvature of the tube.
- Account for Wrapping: Remember that the design wraps around the cylinder. Ensure that critical information, such as barcodes or contact details, is placed where it will be fully visible and not distorted by the extreme edges of the curve.
- Color Management: Be aware that RGB colors on screen may appear differently in print. Use the mockup to check contrast and readability, but always refer to physical proofs for final color accuracy.
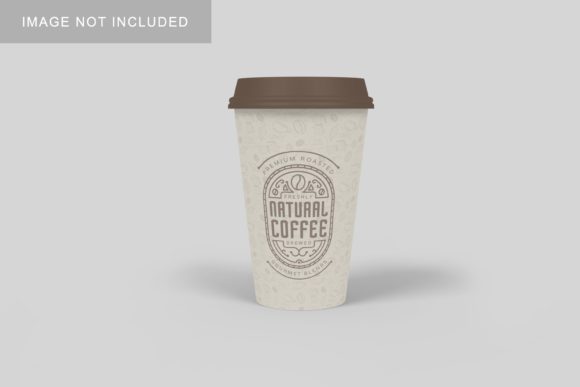
It is also important to note that the photos used in previews are for illustration purposes only. The actual files provided are blank templates, giving you the freedom to create unique presentations without legal restrictions on imagery. This separation ensures that your intellectual property remains distinct and customizable.
Conclusion
Presenting design work effectively is just as important as creating it. A Packaging Tube Mockup offers a streamlined, professional solution for displaying cylindrical packaging designs. By combining realistic 3D rendering with the simplicity of Photoshop Smart Objects, it empowers designers to focus on creativity rather than technical hurdles. With its high resolution, flexible background options, and easy-to-use interface, this tool is an essential asset for anyone looking to showcase their packaging designs with impact and precision.